Project Blinkenlights: embedded Elixir on a Raspberry Pi
November 27, 2016
Introduction
Today I’d like to start a new series of blog posts describing my own journey into the world of embedded Elixir. In this first post I’ll describe the the IoT way of saying Hello World: A Raspberry Pi on steroids nerves booting in three seconds or so into a running Elixir program which in turn uses Raspberry’s GPIO to make a LED on a breadboard go Blinkenlights.
Prerequisites
The following hardware is required for this project. Click on the thumbnails to get more information.
| . | . | . |
|---|---|---|
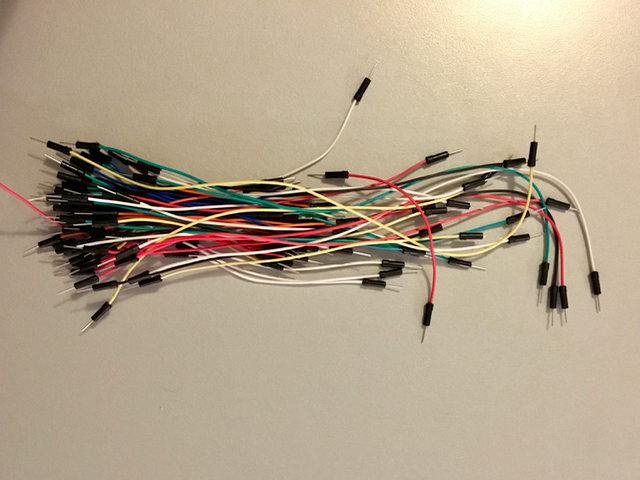
Jumper cables |
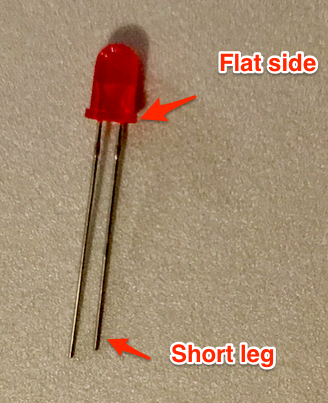
3.3V LED |

Raspberry Pi |
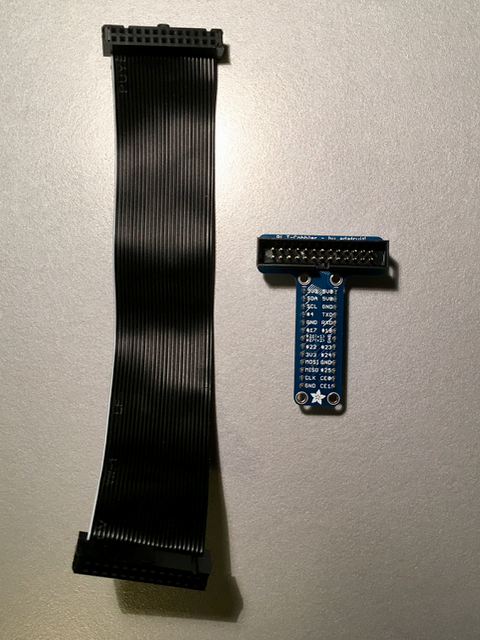
Breakout kit |
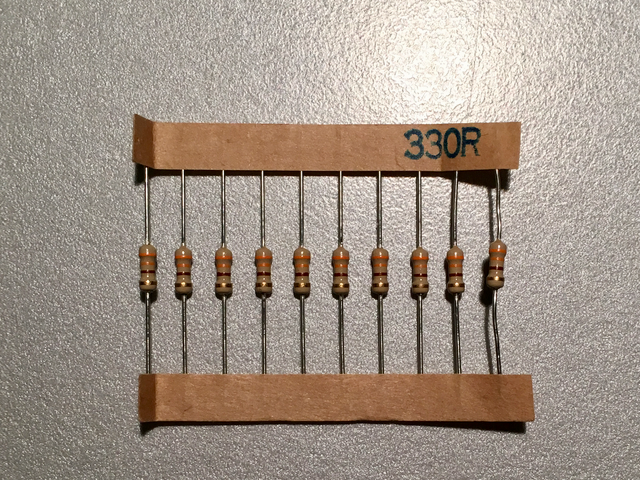
330Ω Resistors |
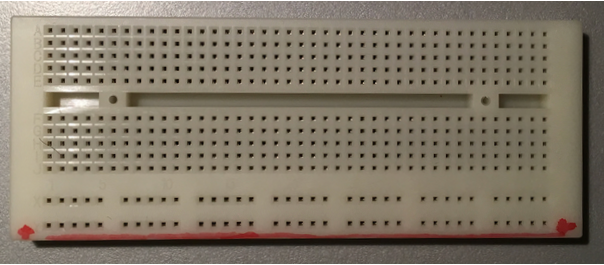
Breadboard |
Wiring everything together
Now the fun part begins. First attach the breakout board to the breadboard as shown in the figure below.
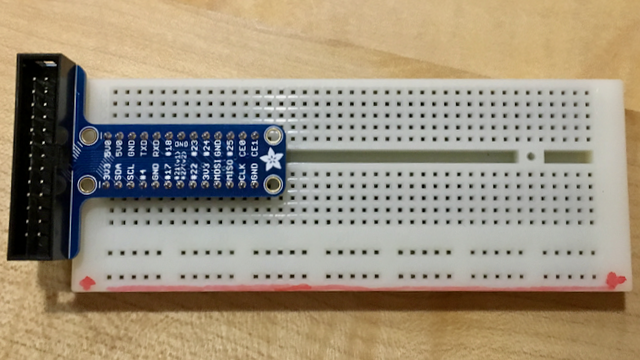
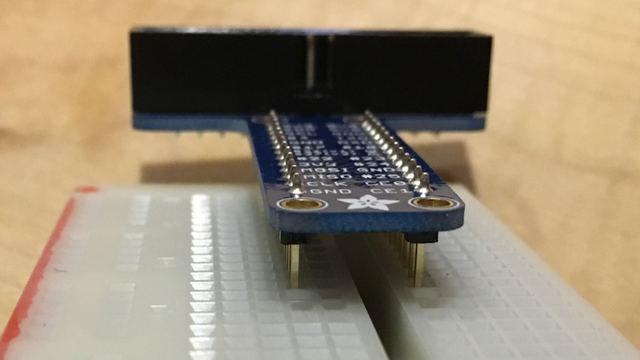
Make sure that the the two rows of pins of the breakout board go on either side of the central divide on the breadboard as shown below. Otherwise you’ll damage your Raspberry as soon as you connect it to power.
With the breakout board in place we then connect the power and ground rails of the breadboard with 3V3 (power) and GND (ground) of the Raspberry.
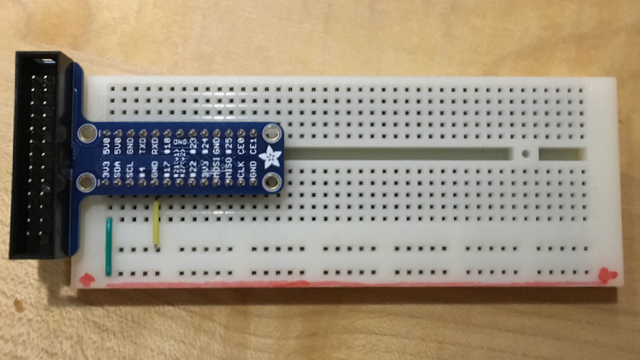
Next we fit the LED on the breadboard. Make sure that you alway put the legs of the LED into two different columns.
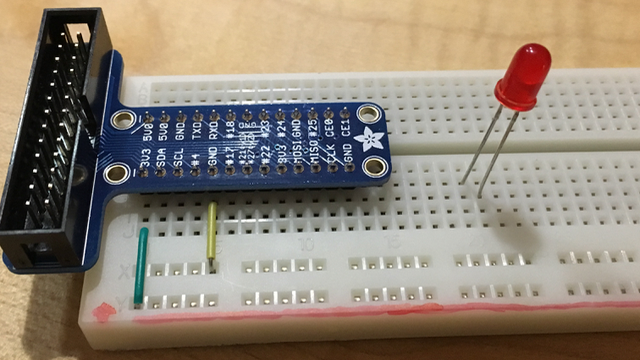
Then we connect the column with the rounded and longer legged power side of the LED to the column of GPIO #18. You could also user e.g. #4, #17, #24 etc. Just remember the pin you actaully used because this is the number you specify in your Elixir code later on.
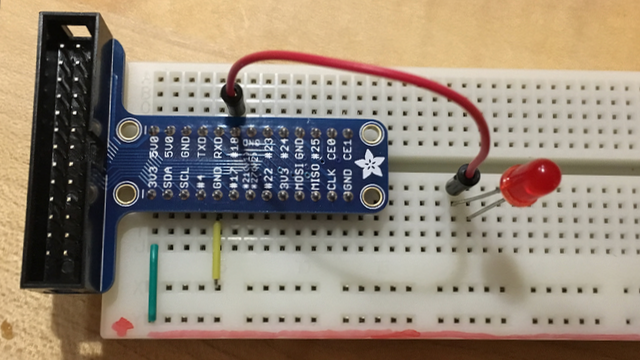
At last we connect the column with the flattened and shorter legged ground side of the LED to the ground rail using a 330Ω resistor.

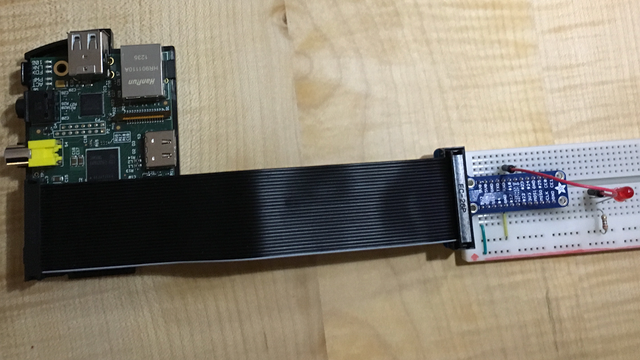
Now you simply connect the Raspberry Pi to the breakout board using a ribbon cable. Make sure that the white or red colored stripe of your ribbon cable goes to the outer edge of your Raspberry.
Programming Blinkenlights
Now that we have our hardware ready we need to instruct the Raspberry Pi to actually blink the LED by cyclically turning power on and of for GPIO pin #18.
We do so be writing the necessary business logic in Elixir. Then we rely on the excellent Nerves Project for the heavy lifting. Nerves basically compiles our Elixir code and automatically packs it together with a BEAM runtime and a minimal linux into a ~12MB image and then burns this image to an SD card. Once this is done you just put the SD card into the Raspberry Pi and power it up. Within three seconds or so, Raspberry is completely up and running your Elixir program which blinks the LED. So let’s get started.
First we install the required software following the Nerves installation instructions. On a mac with Homebrew installed this is as simple as:
$ brew update
$ brew install erlang
$ brew install Elixir
$ brew install fwup squashfs coreutils
Linux users can follow these installation instructions. Windows users: I guess that installing a virtual machine (e.g. virtualbox) is the easiest way to get Elixir, Erlang, and fwup set up and running.
Next we need to install hex and rebarElixir packages locally. This is where Elixir’s mix command starts to shine. To quote the documentation: Mix is a build tool that ships with Elixir that provides tasks for creating, compiling, testing your application, managing its dependencies and much more. Installing the aforementioned packages locally is as easy as:
$ mix local.hex
$ mix local.rebar
Next we install nerves_boostrappackage which basically takes care of all the heavy lifting in the background that is necessary to compile our Elixir code into a complete firmware image including a custom linux, an Erlang beam runtime environment, at boot configuration, etc. so that we only have to put that firmware image (a single file) onto a SD card and put that one into our Raspberry Pi.
Nerves Bootstrap package also provides a command line tool that let’s us create a default nerves project directory with sensible defaults (similar e.g. to rails new for web projects).
$ mix archive.install https://github.com/nerves-project/archives/raw/master/nerves_bootstrap.ez
And that’s it! Now we’re ready to start coding our business logic. First we create a new nerves project called blinkenlights:
$ mix nerves.new blinkenlights --target rpi
Note that you might want to specify a different target platform depending on the hardware you use. Here’s a list of currently supported target platforms that - at the time of writing - includes BeagleBone Black, all sorts of Raspberry Pi, Lego EV3, Alix, Intel Galileo 2, AG150, and QEmu Arm.
Now cd into the newly created project directory and download the required third party libraries.
$ cd hello_nerves
$ mix deps.get
The deps.get command downloads quite a few libraries to your computer. So this this might take some time. Occasionally I get an error message during this step. Simply repeating it solves the problem for me.
Before we start coding we need to add the Elixir_ale library to our project. It provides simplified Elixir access to Raspberry GPIO. Open mix.exs and add Elixir_ale dependency as follows:
def deps do
  [
    {:nerves, "~> 0.3.0"},
    {:Elixir_ale, "~> 0.5.6"}
  ]
end
Afterwards run deps.get one more time to download Elixir_ale to your computer.
Now open the file lib/blinkenlights.ex in your favorite editor (I prefer Atom). This is the file where we add the business logic that ultimately makes the LED blink by cyclically turning power on and off on GPIO pin #18:

Replace the contents in lib/blinkenlights.ex with the following code:
defmodule Blinkenlights do
  use Application

  @moduledoc """
    Simple example to blink a LED light
    on a breadboard which is wired to GPIO #18.
  """

  require Logger
  require Gpio

  @on_duration  200 # ms
  @off_duration 200 # ms
  @gpio_pin 18 #connect to GPIO pin #18


  def start(_type, _args) do

    Logger.debug "Blinkenlights forever..."
    {:ok, pid} = Gpio.start_link(@gpio_pin, :output)

    spawn(fn ->  blink_led_forever(pid) end)

    {:ok, self}
  end

  defp blink_led_forever(pid) do
    Gpio.write(pid, 1)
    :timer.sleep(@on_duration)
    Gpio.write(pid, 0)
    :timer.sleep(@off_duration)

    blink_led_forever(pid)
  end

end
Without going into the very details you can easily see that there is a method start which outputs a log statement, retrieves a reference (PID) to GPIO pin #18, and then calls the method blink_led_forever providing it whith the reference to the GPIO port.
The method blink_led_forever sends an instruction to turn power on to the given GPIO reference, sleeps for 200ms, sends an instruction to turn power off, sleeps another 200ms, and then recursively calls itself again.
If all that code looks a bit unfamiliar to you, no worries: The good news is: We’re done already. No more coding required.
And for those whoe wish to learn more about Elixir language itself: There is an excellent introduction to Elixir as part of its main documentation. Also José Valim, inventor of Elixir, posted a very nice introductory article at howistart.org. Last but not least I can highly recommend the book Programming Elixir by Dave Thomas.
One more thing: We need to transfer our code to Raspberry. Fear not. This is the best part of Nerves Project!
Simply put an SD card into the SD card reader of your computer (note that it’s content will be completely erased so make sure that’s okay for you). Then open a terminal, cd into your project directory, and run
mix compile
mix firmware
mix firmware.burn
Particularly the command mix firmwaremay need some time to complete as it compiles your Elixir code, downloads the linux image for your version of Raspberry Pi, and then merges both into the final firmware image. firmware.burn automatically “burns” the image onto the SD card you inserted before (you are asked for permission before it starts).
Now that’s it. Just put the SD card into your Raspberry Pi and power it up. It takes about 3 seconds to boot right into your Elixir code which then leds you LED blink.
Enjoy! card into your Raspberry Pi and power it up. It takes about 3 seconds to boot right into your Elixir code which then leds you LED blink.
Enjoy! card into your Raspberry Pi and power it up. It takes about 3 seconds to boot right into your Elixir code which then leds you LED blink.
Enjoy!